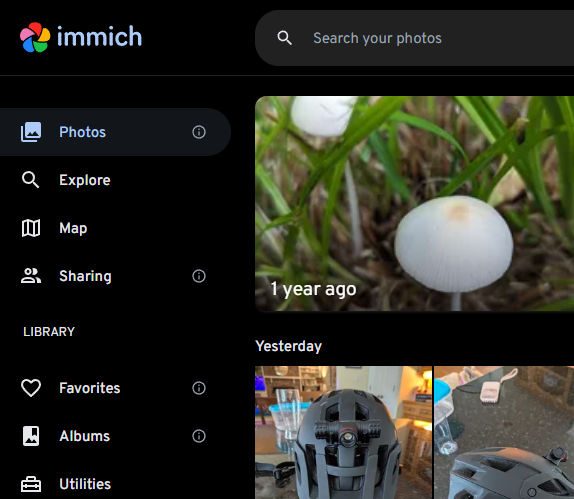
 Recently, I decided to give the self-hosted photo and video solution Immich a whirl and must say, it’s pretty sweet. It kinda feels like hosting your own Google Photos instance given how similar the UIs are. And having used Google Photos for years, I’m not complaining! Anywho, there doesn’t seem to be too much info out there on Immich and Podman specifically, so thought I’d share my approach.
Approach
As I have done for most of my container infrastructure at this point, I wrote an Ansible playbook to deploy Immich via Podman. Ansible takes care of creating all of the various systemd unit files that enable me to keep things running smoothly post-deployment (and quickly deploy elsewhere if needed). I really dig it. Once the playbook - which I will share below - is executed, four containers are created and tied together via a pod:
container-immichdb.service <-- Postgres Container
container-immichml.service <-- Immich Machine Learning Container
container-immichredis.service <-- Redis Container
container-immichserver.service <-- Immich Server Container
pod-immich.service <-- Immich Pod
The Playbook
Let’s break it down into sections..
Create Immich Pod:
---
- hosts: ""

  tasks:

  - name: Create Immich Pod
    containers.podman.podman_pod:
      name: immich
      hostname: immich.example.com
      state: created
Create Postgres Container:
Pay attention to the container name, volume paths and Postgres variables, changing them to suit your needs. There also may be no need to wait five seconds for db init, but I put it there just in case.
  - name: Run Postgres container
    containers.podman.podman_container:
      name: immichdb
      pod: immich
      image: registry.hub.docker.com/tensorchord/pgvecto-rs:pg16-v0.2.1
      rm: true
      state: created
      volume:
        - '/containers/immich/postgres:/var/lib/postgresql/data:z'
        - '/etc/localtime:/etc/localtime:ro'
      env:
        {
        'POSTGRES_USER': 'immich',
        'POSTGRES_PASSWORD': 'immich123!',
        'POSTGRES_DB': 'immich',
        'POSTGRES_INITDB_ARGS': '--data-checksums'
        }

  - name: Wait for DB initialization
    ansible.builtin.pause:
      seconds: 5
Create Redis container:
Change the name as you please. Same detail on waiting five seconds - there’s likely no real need, but meh.
  - name: Run Redis Container
    containers.podman.podman_container:
      name: immichredis
      pod: immich
      image: registry.hub.docker.com/library/redis:6.2-alpine@sha256:51d6c56749a4243096327e3fb964a48ed92254357108449cb6e23999c37773c5
      rm: true
      state: created

  - name: Give Redis a moment
    ansible.builtin.pause:
      seconds: 5
Create Immich container:
I’m choosing to run the release tag here and leveraging Podman’s auto-update ability (via the io.containers.autoupdate label seen below). This label should keep me at the latest stable, but be aware that the Immich team calls out the fact that the app is under heavy development and updates could break things. So be sure to take regular backups. Once again, change any environment-specific stuff to suit your needs. Lastly, note the Traefik labels: Modify or remove per your needs. If you are not using Traefik, note that Immich server runs by default on port 3001. Either use that with your reverse proxy of choice or expose it via the pod for direct access.
  - name: Run Immich Server Container
    containers.podman.podman_container:
      name: immichserver
      pod: immich
      image: ghcr.io/immich-app/immich-server:release
      rm: false
      state: created
      volume:
        - '/containers/immich/data:/usr/src/app/upload'
        - '/etc/localtime:/etc/localtime:ro'
      env:
          {
          'DB_HOSTNAME': 'localhost',
          'DB_USERNAME': 'immich',
          'DB_PASSWORD': 'immich123!',
          'DB_DATABASE_NAME': 'immich',
          'REDIS_HOSTNAME': 'localhost'
          }
      label:
          {
          'traefik.enable': 'true',
          'traefik.http.routers.immich.rule': 'Host(`immich.example.com`)',
          'traefik.http.middlewares.immich-https-redirect.redirectscheme.scheme': 'https',
          'traefik.http.routers.immich.middlewares': 'immich-https-redirect',
          'traefik.http.routers.immich-secure.entrypoints': 'websecure',
          'traefik.http.routers.immich-secure.rule': 'Host(`immich.example.com`)',
          'traefik.http.routers.immich-secure.tls': 'true',
          'traefik.http.routers.immich-secure.tls.certresolver': 'le',
          'traefik.http.services.immich.loadbalancer.server.port': '3001',
          'io.containers.autoupdate': 'registry'
          }
Create the Immich ML container:
Change name/volume as needed.
  - name: Run Immich ML Container
    containers.podman.podman_container:
      name: immichml
      pod: immich
      image: ghcr.io/immich-app/immich-machine-learning:release
      rm: false
      state: created
      volume:
        - '/containers/immich/model-cache:/cache'
Create systemd Unit Files:
I have a few mounts I require for these services to start. Remove or change as needed.
  - name: Create systemd unit file for immich pod and containers
    containers.podman.podman_generate_systemd:
      name: immich
      new: true
      requires:
        - containers.mount
        - containers-immich-data.mount
      restart_policy: always
      no_header: true
      dest: /etc/systemd/system
Start the pod:
  - name: Ensure immich pod is started and enabled
    ansible.builtin.systemd:
      name: pod-immich
      daemon_reload: true
      state: started
      enabled: true
Run the playbook, being sure to specify your host to execute on via the host_var variable and that should do it. Here’s my immich.yml file if desired. I hope this helps someone get started :)
As for importing photos from Google, I recommend using Google Takeout to pull your photo archive down and Immich-Go to upload them into your Immich server. It rocks! For things outside of Google, also note that Immich has a cli tool that allows you to bulk upload as well.
Cheers!